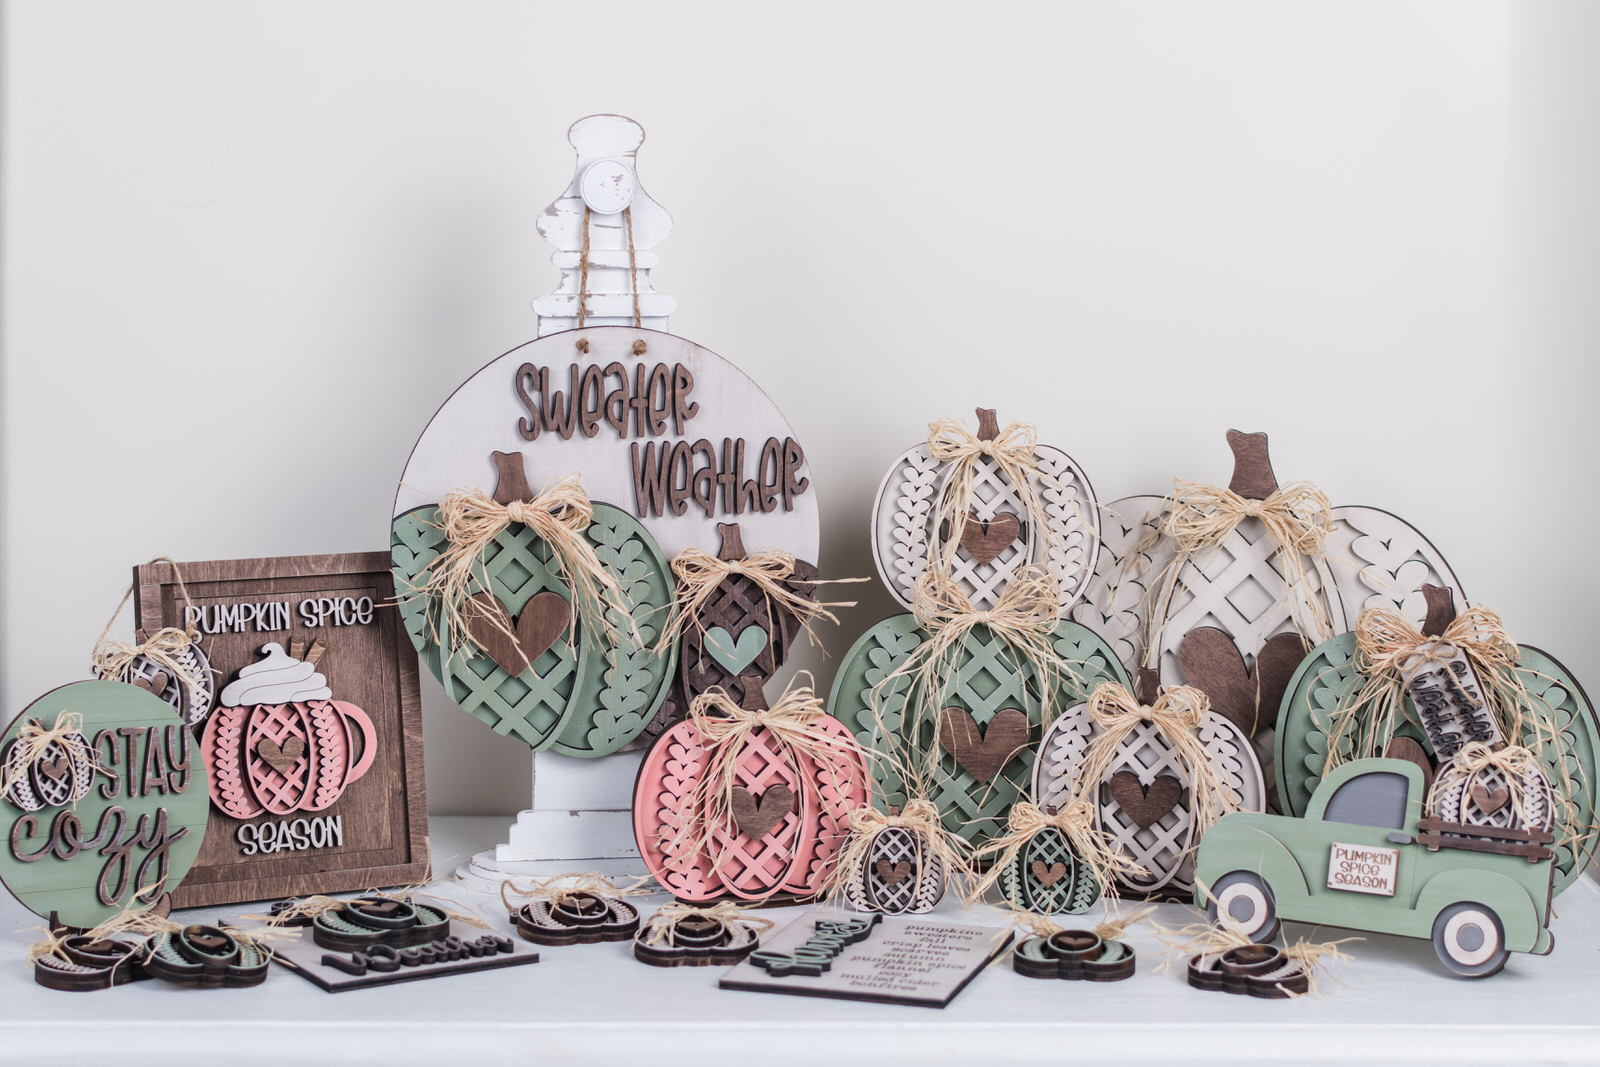
Wooden Sweater Pumpkin DIY Kit
It’s that time of year when we get the itch to start or at least think about decorating for fall. If you like to DIY some of your decor, you most likely are getting that started already. Well that brings me to my new Wooden Sweater Pumpkin DIY Kit Series I just launched! There is a detailed video showing you how I painted some of the pieces. They are all painted the same way, so you can watch it and then know how to paint them all. Of coarse the whole idea of DIY is to paint them with your colors and style, but it is nice to have a jumping off place and get some ideas and tips.

Diy Sweater Pumpkin Kit Series
There are four different kits in the series:
1. Sweater Pumpkin Door Hanger – Sweater Weather
2. Sweater Pumpkin Shelf Sitters
3. Sweater Pumpkin Tiered Tray Decor – Stay Cozy
4. Sweater Pumpkin Sign Trio – Interchangeable – Pumpkin Spice
Additions to the kits:
1. Farmhouse Frame
2. Post Sign Hanger
I listed above an extra add on sign post holder and farmhouse frame. You can use these for all seasons! It’s a great way to display a door hanger without putting it on the door.


Supply List
Fusion Mineral Paint:
Coral
Conservatory
Cashmere
Hazelwood (tiniest bit for truck window & hub caps)
Saman Water Based Stain:
Dark Oak
Colonial (tiniest bit for one stem on the Door Hanger)
Aleene’s Tacky Glue
Sand Paper
Hot Glue
Raffia
Jute for Door Hanger & Garland/Hanging Pumpkins
Makeup Sponges (for painting)
Scruffy Paint Brushes AND/OR Chip Brushes (for dry brushing)
Artists Paint Brushes in various sizes
Blue Shop Towel
Baby Wipes
Fine Sandpaper – 220- 400 grit
Spray Sealer
Chalk Couture Tool mentioned in video.
Full details will be in the video posted below. However, I do want to offer some quick basic instructions in the written form.
- Start by giving your wood pieces, a very light sanding and cleaning up the edges with a baby, wipe and sandpaper to remove some of the charring that comes from laser cutting. You will notice this more if you received pieces cut out of Baltic Birch, as it is a nature of that wood. It will be less noticeable on pieces that are cut from the maple pure bond. In fact, you may not even have to clean the edges up at all. Remember to sand with the grain. Keep your pieces in the templates, as that will help with keeping an neater edge when painting.
- Base coat all of your pieces using a very light touch with your makeup sponge. Be very careful when going over engraved areas. The video shows this well. Dip your sponge into paint, and offload a lot of that paint before placing it on engraved surfaces and edges so that you do not have paint shaping down the sides or getting into the engraved areas. Your scored areas don’t matter as much as they are simply there for placement.
- You can use some larger artists brushes for painting the bigger surfaces. Just be careful to not get your paint down the sides. If you do clean it up with a baby wipe right away or sand it away after.
- Whichever base coating technique you use, you will need two coats of paint and I lightly sand in between coats.
- Once your base coating is all dry, it is time to dry brush.
- You will want to use a scruffy brush or a chip brush. I tend to use a scruffy brush in the smaller areas and a chip brush in the larger areas. These brushes need to be dry.
- Dip your brush into a little bit of paint and offload a lot of it onto a paper towel.
- Starting on the edges go back and forth with a light touch to dry brush your colour on. I use cashmere to dry brush all the colours, except I used dark oak stain to dry brush on my cashmere base coated pumpkins.
- Now it is time to take all of your small pieces out of their templates and glue your pieces together using Aleene’s Tacky Glue. The truck will stand freely, however there is kick stands included in your kit. Glue one piece onto the back of the truck, the quarter rounded piece, can be glued in, however I like to keep it unglued and then you can adjust the angle that your truck sits at. It also helps to store it easier.
- This is the time to spray seal to make sure that any extra charring on the edges is sealed in. The video also explains this well.
- Make bows from raffia and glue on using hot glue.
- Attach jute to the Door Hanger & Garland/Hanging Pumpkins.
- Display & Enjoy!
Sweater Pumpkin Tutorial:


I can’t wait to see how you put your own spin on these cute sweater pumpkin DIY kits. Please leave me a comment below and share a photo.
If you want to be the first to know when new collections launch, DIT Kits are available, DIY videos are posted, sign up below for the VIP list & enjoy a special discount when you order.
Like what you see? Pin for later so you can easily find it.


