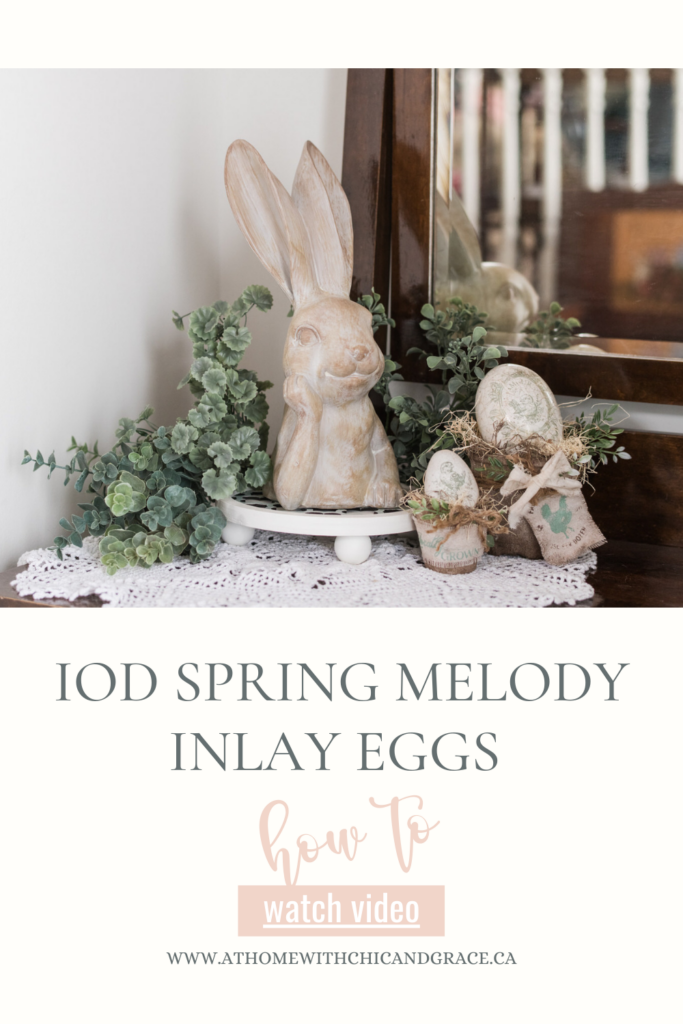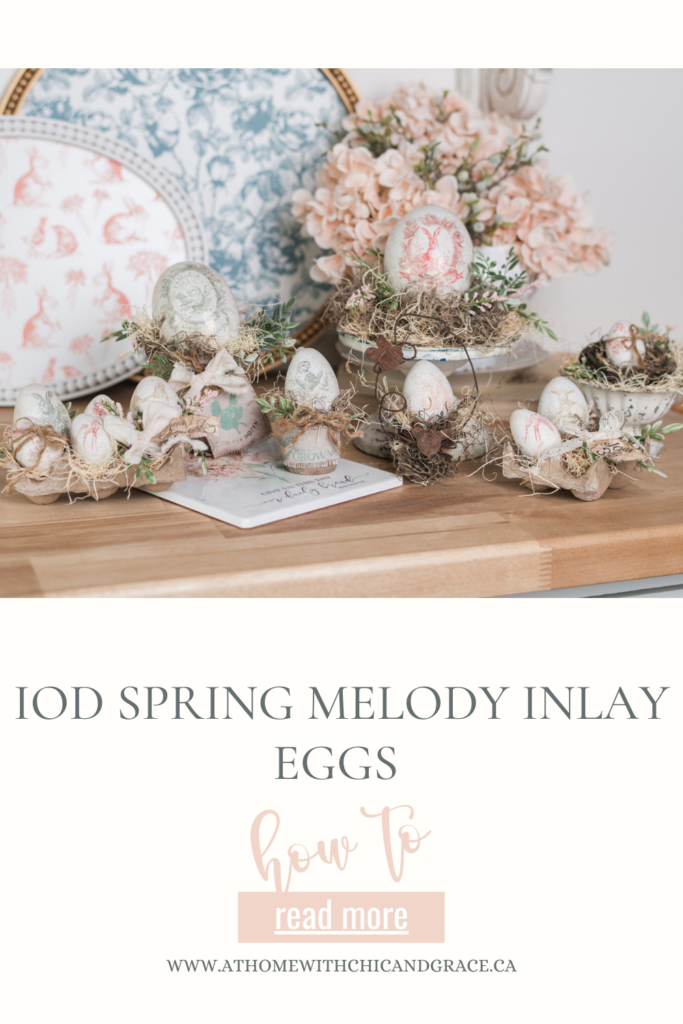
Crafting with IOD’s Spring Melody Paint Inlay on Wooden Eggs
I love to decorate for Spring. What better way to customize your home decor for the season than by crafting beautiful wooden eggs using IOD’s stunning Spring Melody Paint Inlay? This project combines the charm of handmade decor with a soft color palette for spring. Here’s how to create your own decorative wooden eggs using IOD Spring Melody Paint Inlay!
Materials Needed:
- Wooden or plastic eggs (available at Dollarama or craft stores like Michaels)
- IOD’s Spring Melody Paint Inlay (Iron Orchid Designs)
- Paint Brushes
- Chalk Paint – Rustoleum Linen White
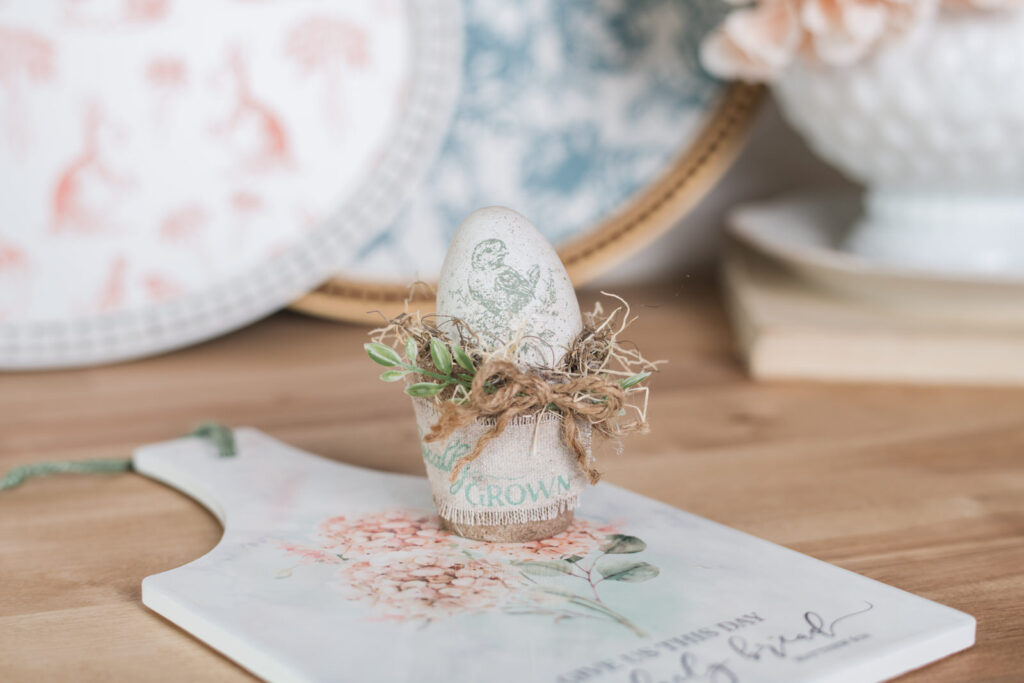
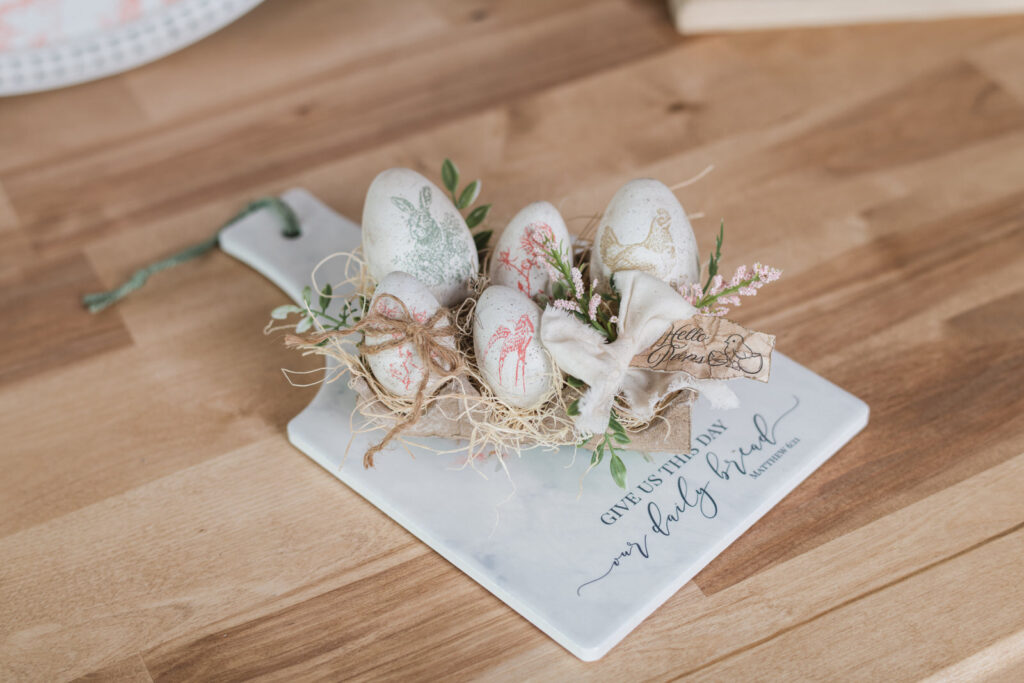
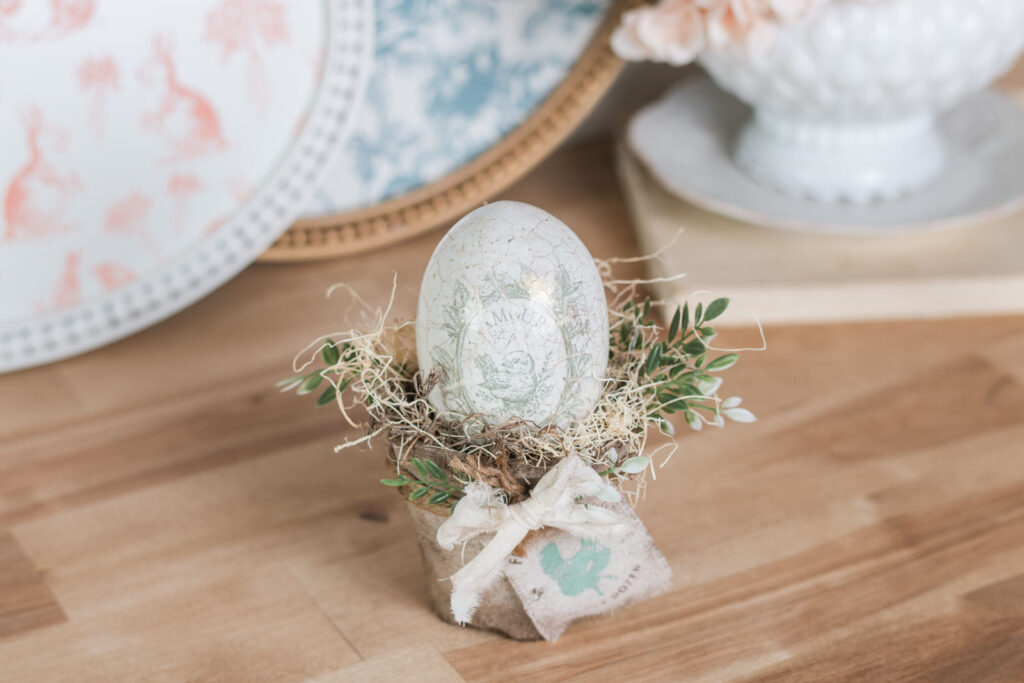
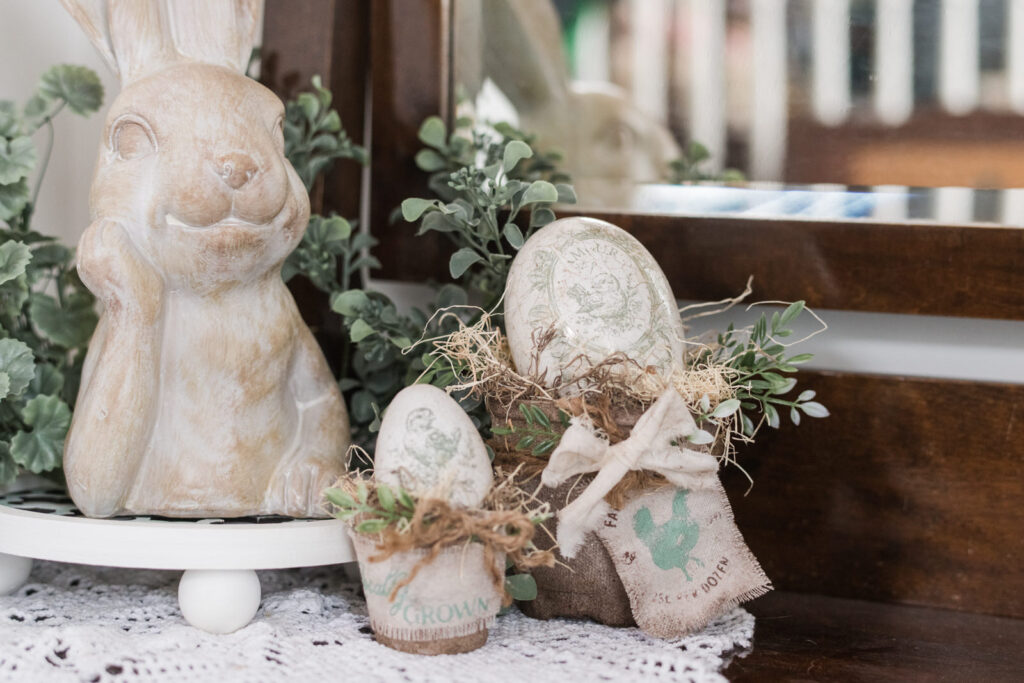
- Egg Carton and/or other vessels for your eggs to be displayed – I used some peat pots as well as other items I found in my home.
- Brown Paint of choice for spattering (I used Algonquin from Fusion mineral Paint)
- Fan Brush for spattering
- Pentart Fineline Crackle
- Pentart Gold and Umbre Wax
- Behr Clear, white & Antiquing Wax
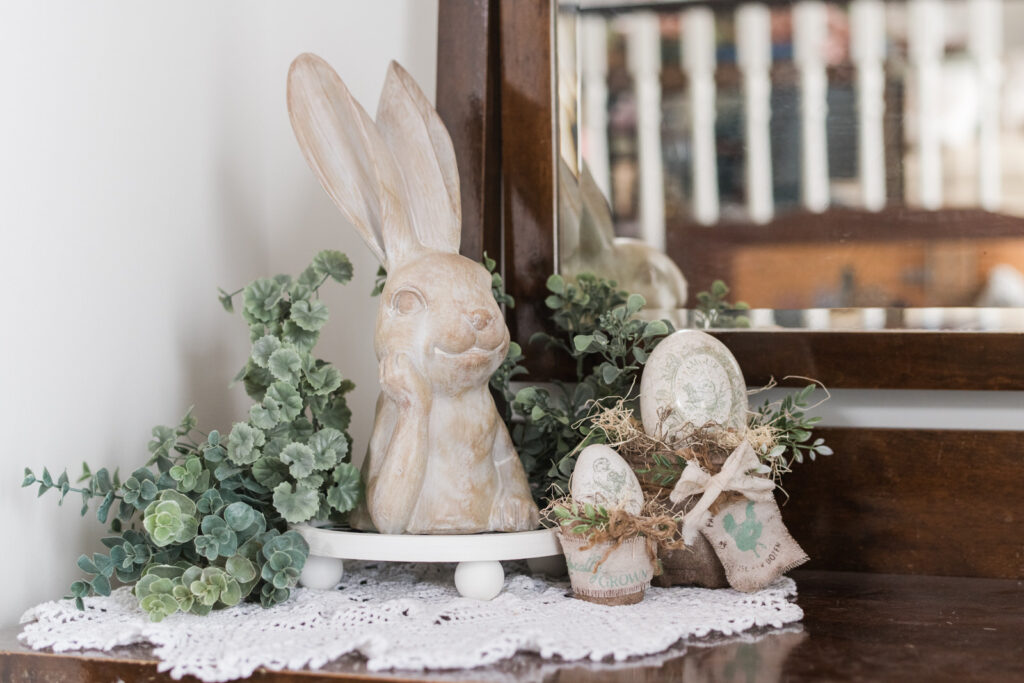
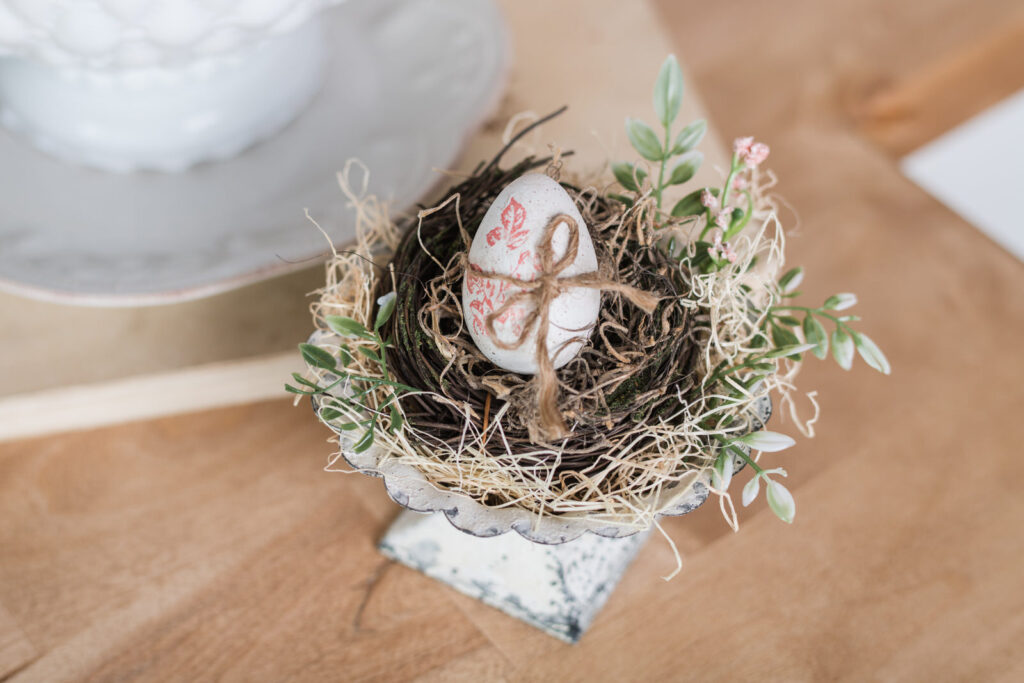
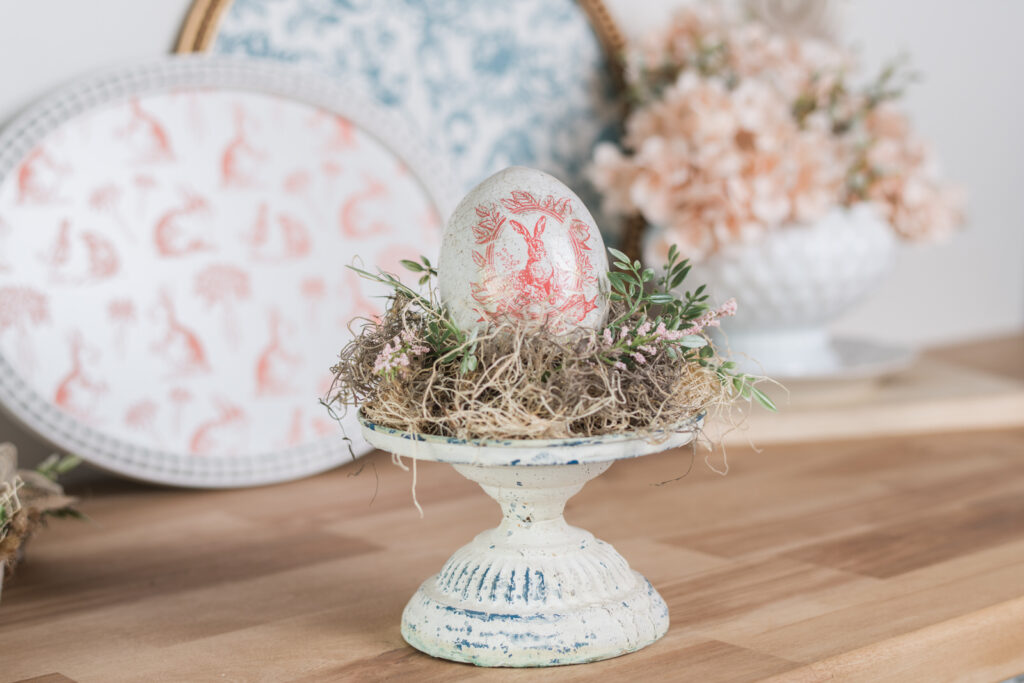
- Paper shred, shredded wood, excelsior or spanish moss for fillers.
- Bird Nests
- Paper towel and Baby Wipes
- Spray Sealer
- Scissors
- Water mister
- Embellishments: such as ribbons, fabric, jute or floral accents
- Tag Options:
- Paper Tags I used were printed from Hammons Nest Private Group – Summer’s Creative Nest. You can find her on Facebook.
- Drop Cloth Tags – Chalk Couture Transfers can be found here. ( the ones I used are retired but there are so many more to choose from)
- Drop Cloth pieces for the tags above
Step-by-Step Instructions on Using IOD Paint Inlays:
- Basecoat: Apply a coat of chalk paint and let dry.
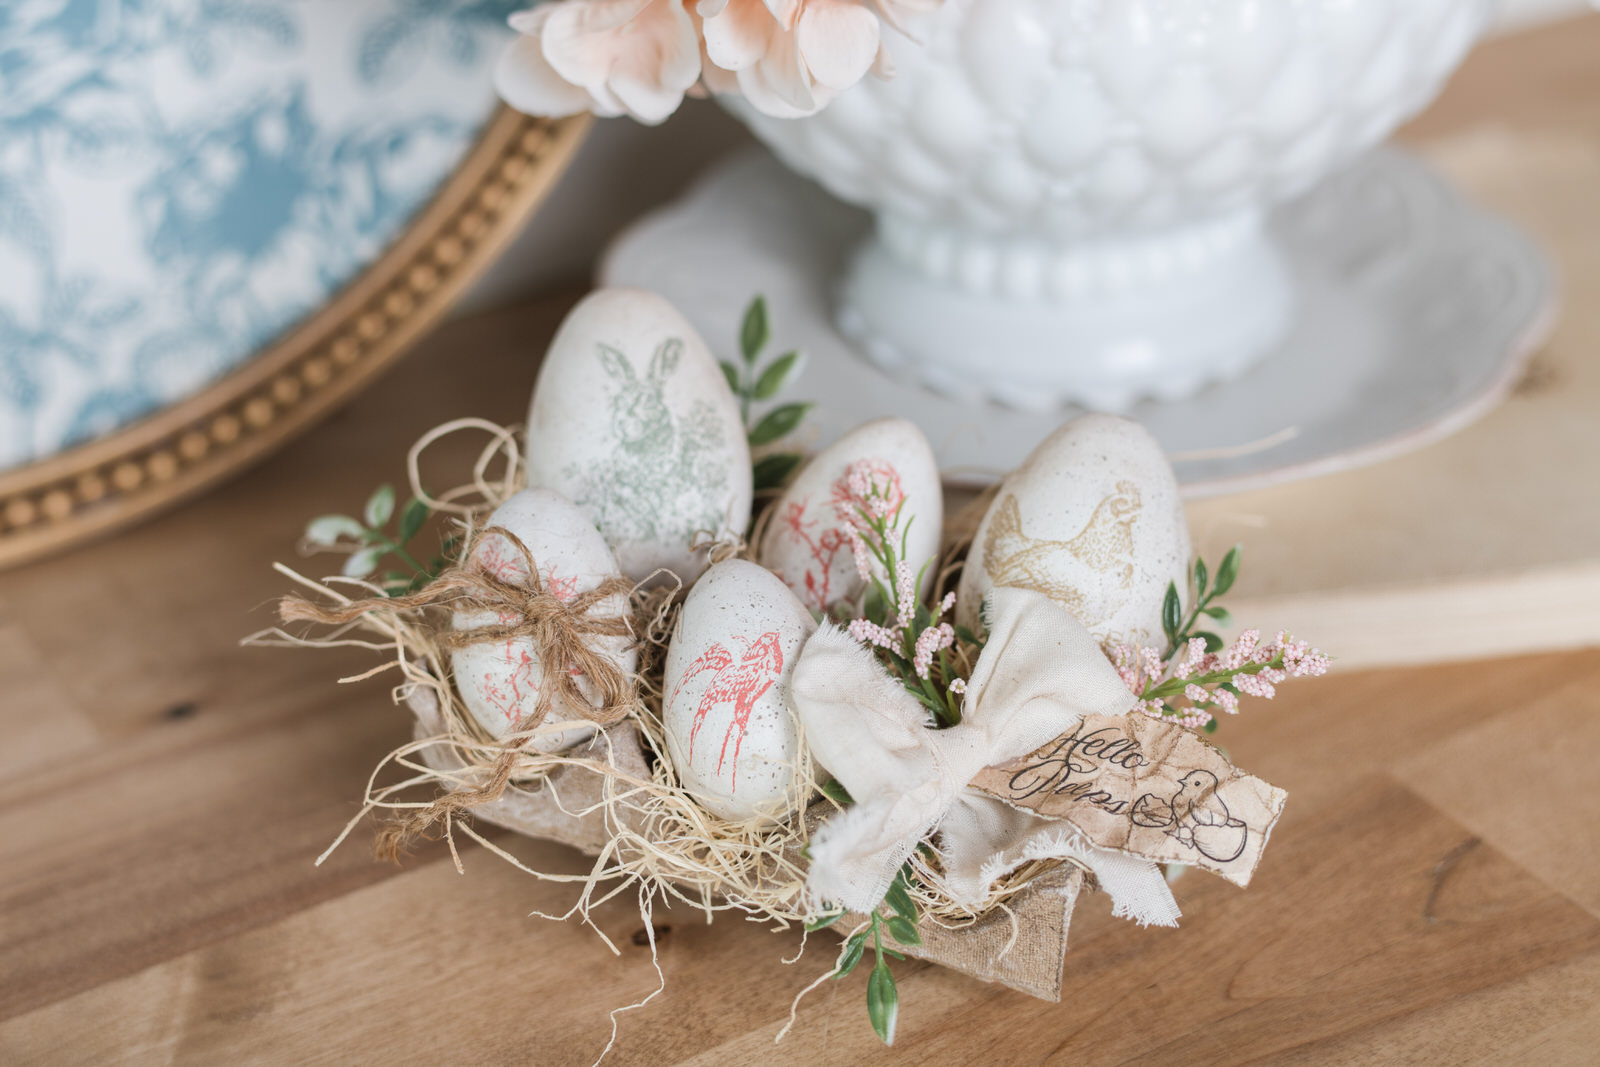
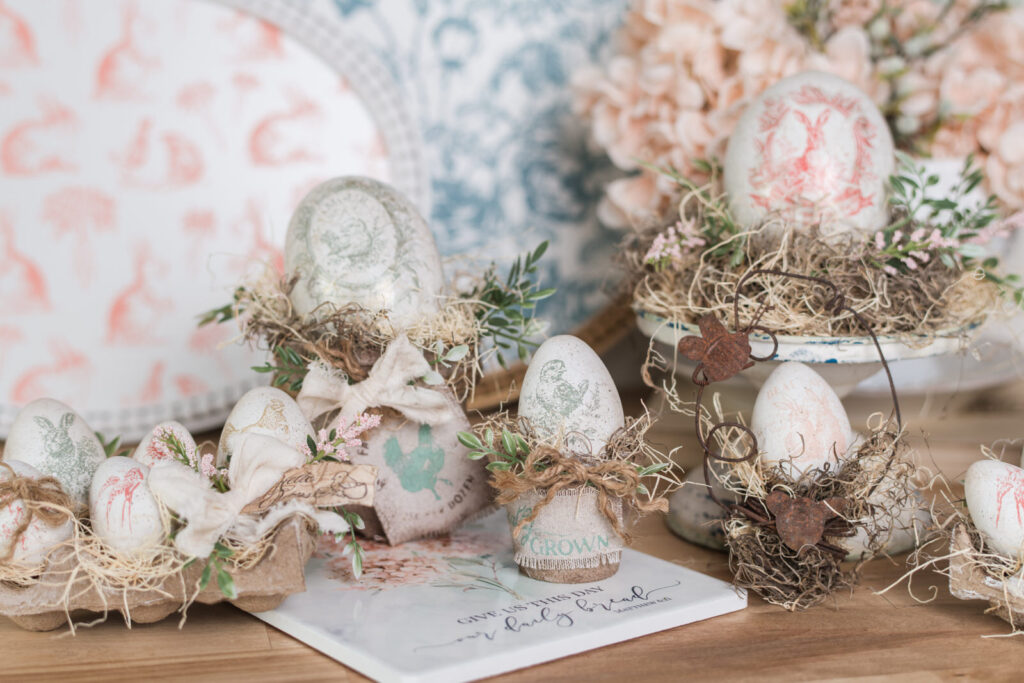
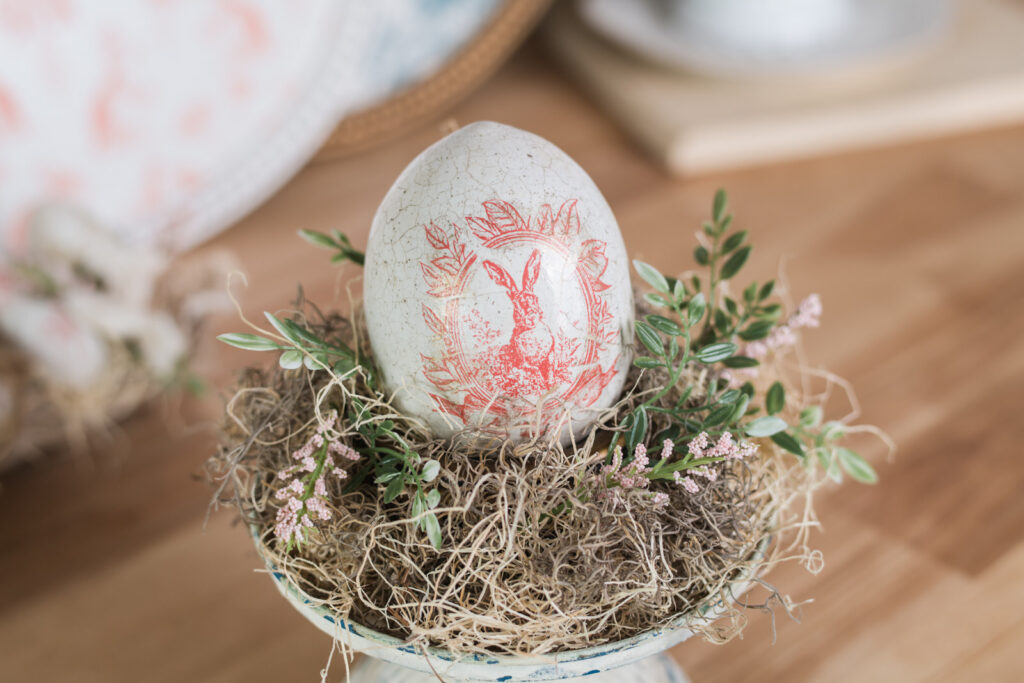
- Cut the Inlay: Carefully cut the IOD Spring Melody Paint Inlay into suitable sizes for your wooden eggs. Cut relief cuts as shown in video to help it lay fletter on the round surface of the egg.
- Apply Inlay: Apply second coat of paint and while still wet apply inlay paint side down. spray lightly with a water mister and gently press down into wet paint
- Let Dry
- Remove Inlay: Once the inlay is dry, it will be opaque. Spray lightly and blot with a baby wipe or paper towel. Remove to reveal your paint inlay. Let dry thoroughly. It is important at this time, not to let any water touch your surface, as your inlay paint can be reactivated.
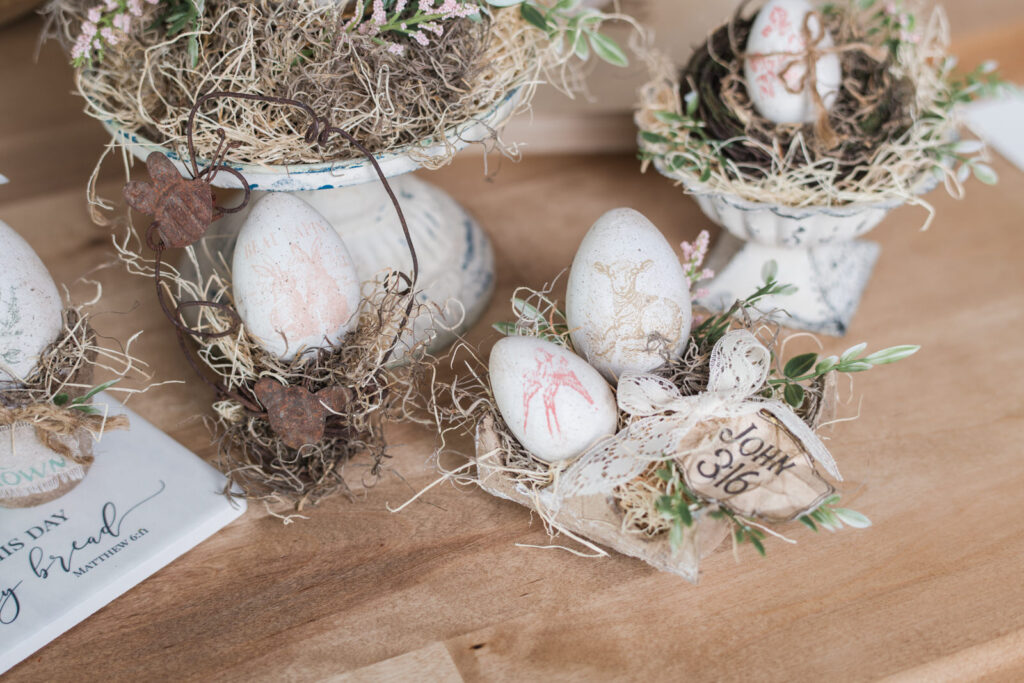
- Spatter: For speckled egg effect, I speckled with fusion, mineral, paint Algonquin and a fan brush. You can use any brown paint, or any colour for that matter.
- Seal the Design: Once the paint inlay has dried, apply a coat of spray sealer over the entire egg. This will protect your design from the paint reactivating. this is important if you are going to add any more layers to your egg. Such as the fine line crackle that I added to the large eggs. Allow the sealer to dry completely.
- Apply wax: Apply clear wax to the small eggs, and then lightly add some antiquing wax and buff back with a paper towel.
- Apply Fineline Crackle: Apply step one of your paint art fine line crackle to the large eggs with a dry clean paint brush. Let dry. Once dry, apply step two with another clean dry brush and let dry.
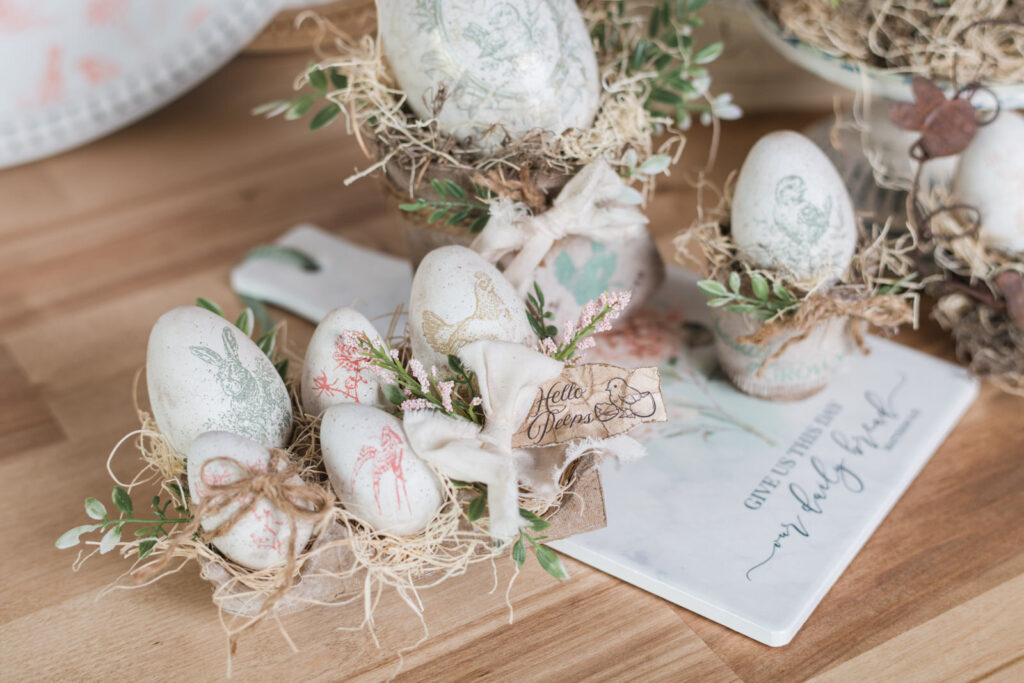
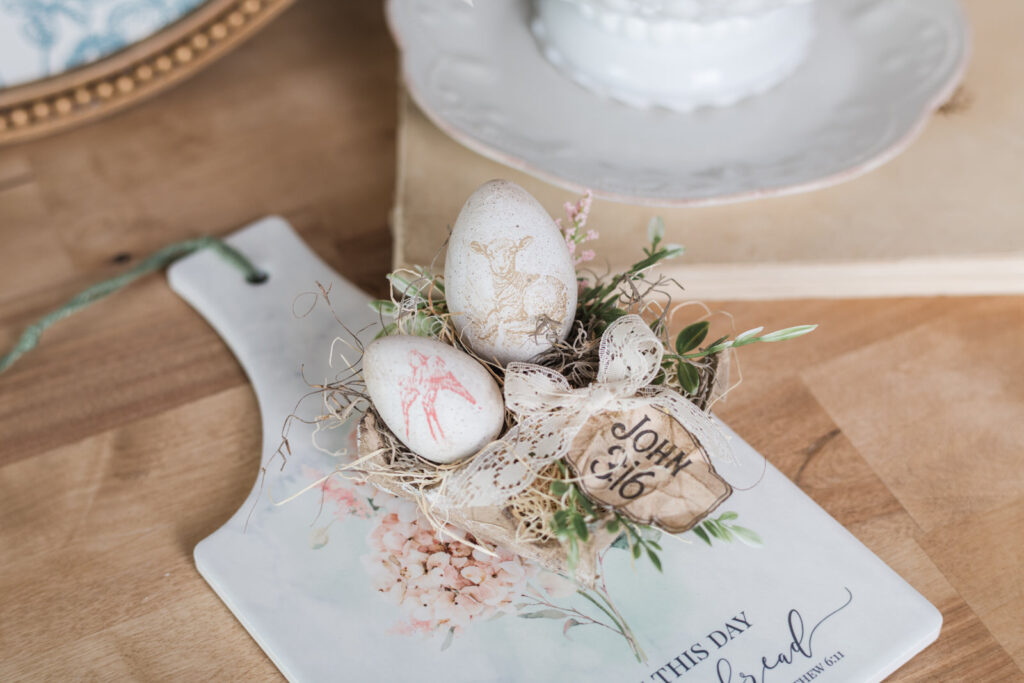
- Apply Wax: With a stiff brush, apply antiquing wax onto the egg and rub into the cracks to reveal them. They will end up, looking like beautifully, aged, crazed porcelain. Add gold wax in some places around the frame of the design.
- Make your tags: I printed out some tags and distressed them, as shown in the video below. For the other tags I had scrap pieces of drop cloth fabric, and then they use a silk screen transfer on them.
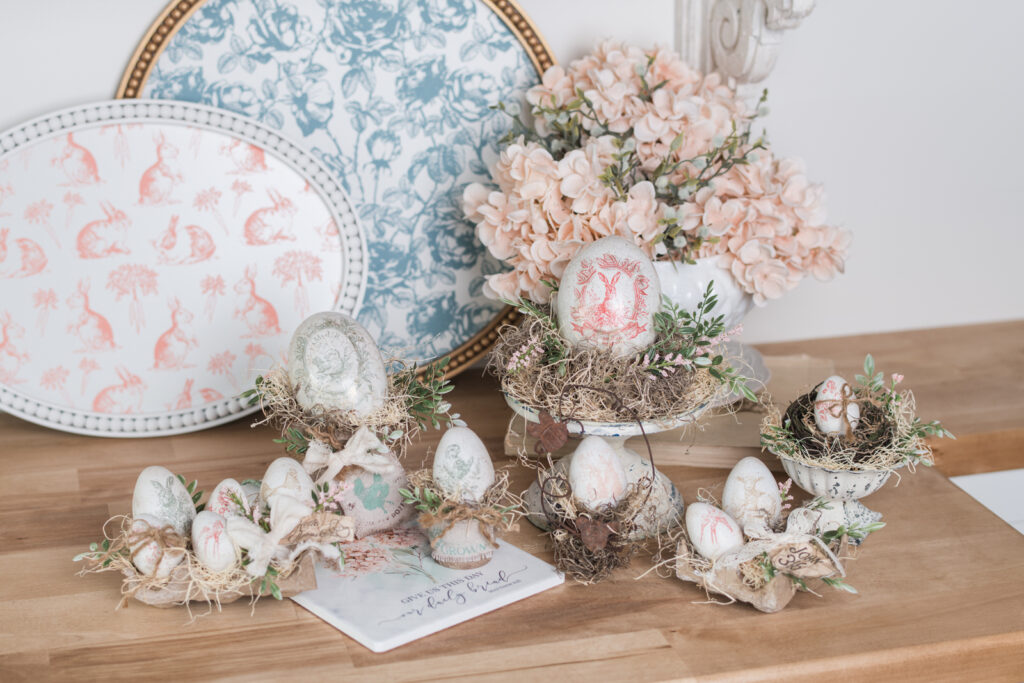
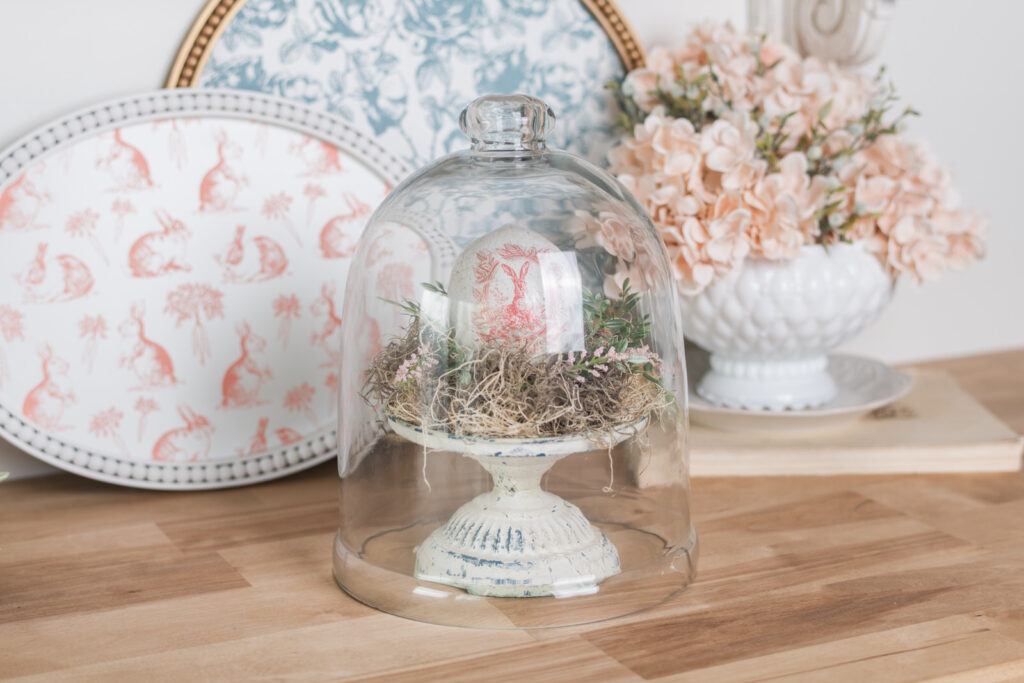
- Add Embellishments: Once your eggs are fully dried, get creative! Add ribbons, moss, or floral accents to customize to your decor. You could create little nests or display them in egg cartons, peat pots or any found surface.I will show you a few ideas below.
- Display Your Creations: Find a perfect spot to showcase your beautifully decorated wooden eggs. They make fantastic centerpieces, festive decorations, or even gifts!
Video Tutorial:
Creating with IOD’s Spring Melody Paint Inlay on these wooden eggs really got my creativity flowing!! I hope you enjoyed this tutorial and I would love to see your creations if you try using IOD Spring Melody Paint Inlay on some eggs!! Happy crafting!