DIY Topiary Pumpkins out of Drop Cloth
This is the tutorial you have all been waiting for! Really actually you have been waiting for it for a couple years now! I finally was able to re-create my popular drop cloth pumpkin topiaries that I made for my front step back in 2020 and film a tutorial!

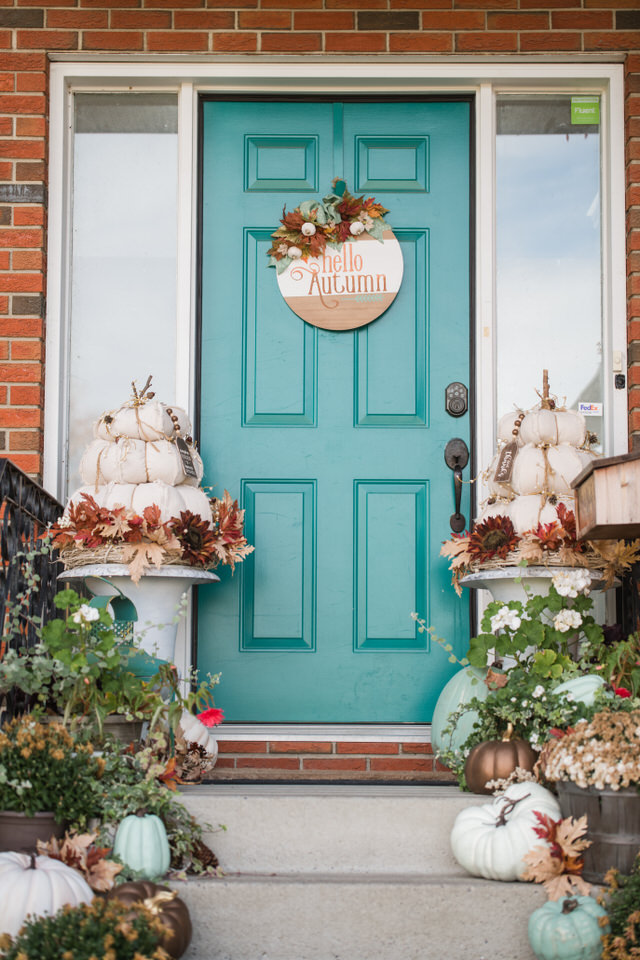
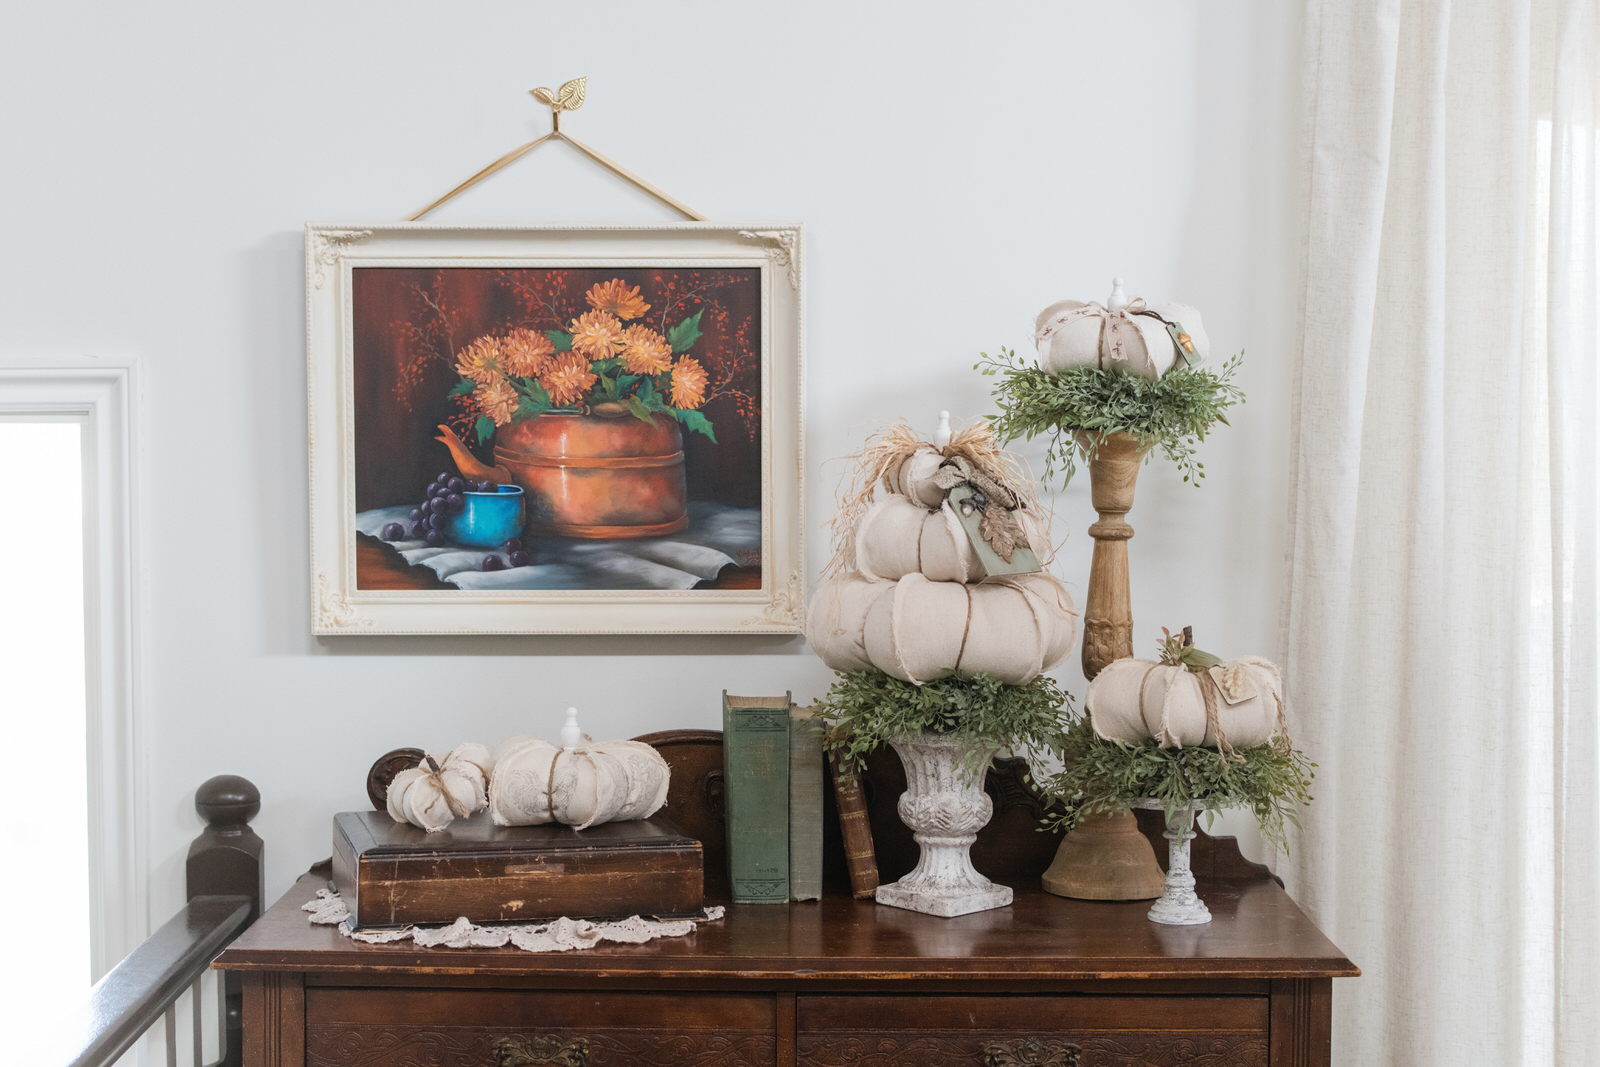
Making topiary pumpkins out of dropcloth is super easy! I first made them for my front steps and decorated them with a very soft monochromatic look. Below I will show you how I decorated them over the years to get a completely different look every year. I have since moved from that monochromatic look to adding back rich fall colours which I love!!
You may be wondering how they hold up outside? Well, mine have been out there every fall for the last four years. They are sheltered, they are under a bit of an overhang. However, they have been rained on many times! They’ve also been snowed on as well. They’re holding up well, I just make sure they’re fully dried out before storing them for the season.
I’m sharing with you how my front step has looked with my topiary pumpkins from year to year. Starting with 2023:


2022:
They didn’t look a lot different from 2023. I did paint my earns I did paint my urns white this year and made new tags. You will see the difference below when you see 2021.


2021:
The urns were black! What a difference, I think both look good. 🙂 This year I painted my real pumpkins too! YOu will have to excuse the crooked photos! 🙂


2020:
Where it all began!


So now that we’ve seen how they’ve taken on a slightly different look each year, let’s get onto how to make these dropcloth topiary pumpkins!
THE SUPPLIES
Drop Cloth
Hot Glue
Sewing Machine OR Hot glue
Scissors
Jute Long Needle with large eye for jute to go through
Twigs or Finials in various sizes
Urn or Pot Long
Floral foam
Dowel – 1 1/2 times the length of your finished topiary
Stuffing (for pillows)
Tags – optional
Spanish Moss – optional
Fall Florals or Greenery – optional
Ribbon – optional
IOD La Campagne Stamp – optional
IOD Permanent Ink – Stone Grey – optional
PATTERN SIZES
Large Topiary:
21″ x 8″
16″ x 8″
10 3/4″ x 7″
Small Topiary:
10 3/4″ x 7″
8″ x 5 1/2″
5 3/4″ x 3 1/2″
I have a full YouTube tutorial on how to make these and it explains everything you need to know. Just in case I will give you a quick breakdown on how to put them together here. Just note, this will be very simplistic and if you want more details, please refer to the YouTube tutorial. I didn’t take any photos while I was putting these together because I was filming the video.
SIMPLE STEP BY STEP INSTRUCTIONS
- Start by making your pumpkin panel templates with a point at the top and appoint at the bottom using the measurements above. For example, 21 inches tall from point to point & 8 inches at its widest point in the middle.
- If you want to add design to your fabric with IOD stamps, or any other stamp, this is now the time to do that. Just make sure you are using permanent ink. You do want to use a little bit more ink and more pressure to make sure that you get a nice stamp transfer.
- With right sides OUT sew or hot glue six panels together for your large and medium pumpkin, I used five panels for the small pumpkins, leaving an opening at the top and bottom for stuffing, and for the dowel to go through. Leave about a quarter of an inch or more seam allowance so you can fray your edges. (I do share some more detailed notes about this in the video)
- When’s your pumpkin is sewn or glued together you can stuff.
- Thread the jute through the long needle.
- Starting at the bottom of the pumpkin go up through the middle around the middle of one of your pumpkin panels, back up through the middle and repeat until all your panels have jute running through them. The video shows this very well!all your channels have jute running through them. The video shows this very well!
- Next insert your dowel into your largest pumpkin, leaving about half of the length of your entire topiary, pumpkin sticking out the bottom. Now of course, you have to take an account the urn or pot you are using. It needs to fit in there.
- Next add on your middle, pumpkin and then of course your small pumpkin. You can at this point have the dowel sticking out of the top of your small pumpkin, and that could be the stem. However I like to only have that dowel come about halfway through my small pumpkin, as I like to add my own stem to the top of the pumpkin.
- I like to glue my dowel to the bottom of my large, pumpkin and close that hole up.
- Add the stem of your choice to the top of your pumpkin.
- If needed, use glue to close up the top of your pumpkin and wrap some jute around your stem to hide where you had to glue your hole together.
- Add a little floral foam to the part of your choice so that your dowel has something to sit in and stand upright.
- Decorate to your liking! (I have some ideas below)
- Enjoy!
HOW TO VIDEO:
Examples of how you can decorate and style your topiary pumpkins.


One of the great things about DIY is you get to make this however, you like to fit your decor! For example, who says you have to use drop cloth, as you can see, I used some other fabric to make my turquoise pumpkins.
The possibilities are endless to what you could do! You could silk screen, stamp or use transfers such as IOD for example.
I can’t wait to see your creativity and what you come up with! Feel free to leave a comment below and show me photos of what you have made!
Be sure to keep an eye open, as I will be showing you how I created these distressed, weathered, crackled urns and risers in another YouTube video soon! As well, leave me a comment below if you want to learn how to make these tags I showed!


